The Avaya SBCE gives us the ability to block a caller from making harassing calls, and in this post, we outline how you can do that on an Avaya SBCE.
Creating a URI Group
The first step you will want to do is add URI Group and outline which number or numbers you wish to block. From your SBCE web interface, go to Global Profiles-> URI Groups and click Add. Below we added a group called "Harassing-Callers."

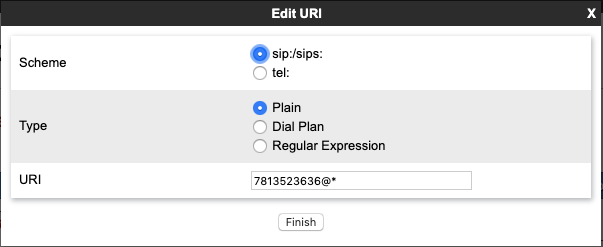
On our URI group, select sip:/sips: as the scheme and Plain as the type.

In the URI box, put the phone number you wish to block. You can use wildcards to match multiple numbers if you need to. Here we are trying to stop one number from calling us. This step will stop this number from calling us from any SIP domain. Once you click finish, you can then click add and input multiple numbers under our URI group if you need to block more than one number.
Create a Security Rule

Next, navigate to Domain Policies-> Security Rules.
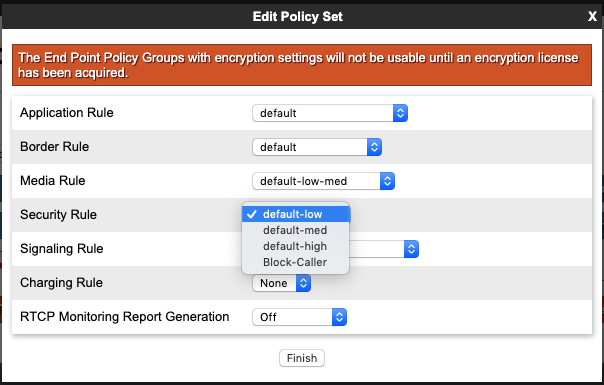
Choose the default-low rule and then click Clone on far-right and name it Block-Caller click finish; you can name it whatever you like just keep track of it for the next step. After you have created the rule, click the rule name, and then click edit. While in edit mode, click the drop-down and choose the URI group we created previously.

We will utilize the security rule later on in our configuration.
Create an End Point Policy Group

Next, navigate to Domain Policies> End Point Policy Groups and select the
default-low Select and click Clone on far right. We named ours "Block-Caller" and then click finish. Next, click to edit your End Point Policy Group you created and from the security rule drop-down select "Block-Caller" or whatever security rule name you used previously.

Select Block-Caller End Point Policy Group
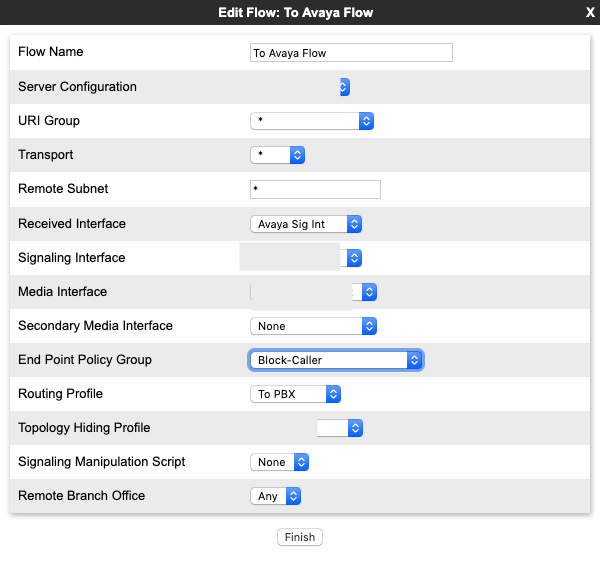
Next, navigate to Device Specific Settings> End Point Flows and click on the Server Flows tab. We want to find the Server Flow to block calls from our number we set up in our URI group. This may be the End Point Flow that points towards your SIP carrier. The names of the routing profiles will likely be different on your SBCE since the fields are free form text.

On this screen, we want to click the drop-down for End Point Policy Group and find our End Point Policy group that we created previously. Once this is applied, we can check out our SBCE to make sure that it is responding correctly.
Checking that our rule is working

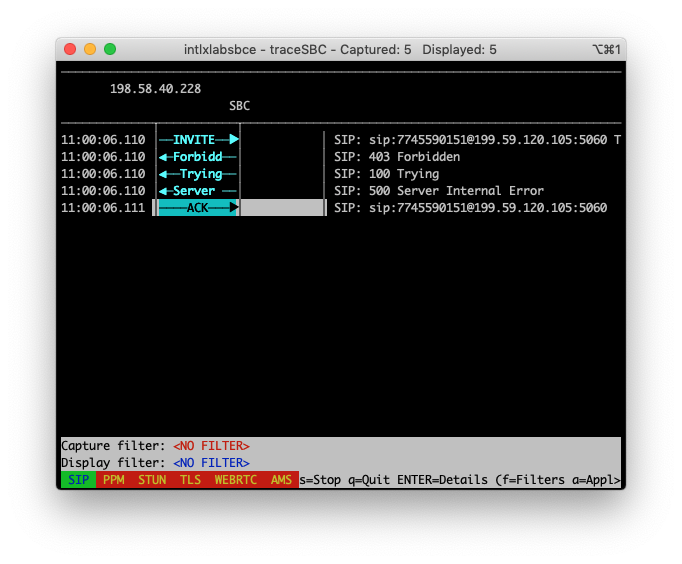
Here we have logged into our SBCE and launched the traceSBC command from the Linux command line and started tracing. A call was placed from our blocked number into one of the DID's on our SIP trunk.
If the rule is working correctly, the Avaya SBCE will respond with a 403 Forbidden message deny the caller. This stops the call from making it past the Avaya SBCE and onto your Avaya Session Manager or phone system.


